Sunday, July 30, 2006

Introducing Carbon - and The Great Prune.

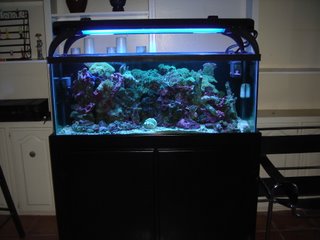
Today was spent pruning the refugeum back. As you can see below in an old post, it had gotten pretty out of control. The guys over at the DFWMAS have been extremely helpful in giving me direction to improve the conditions of my tank. Here it is after the pruning on the left.

When I cleared out the 'fuge I found a white and black striped bristle starfish in there about the size of penny. ( his body ).. And his little legs streaked out to the diameter of a softball! Pretty cool. I introduced him into the display tank, so he could run free! ( well as free as a 75 gallon tank will give him. It's better than that little 10 gallon partion in the 'fuge.


It's also been suggested I run carbon to supplement my Calupra.
So I had some Reef Carbon left over, and introduced it to the sump near the pump in a little nylon tie-bag. Ideally, I'd have a fluval or something efficient to use as a carbon scrubber. I'll have to look into that in the future. For now.. a nylon sack near the return pump's intake will have to do. It's better than nothing.

I'm going to run it for a week, and replace it, and try that schedule...

Otherwise, I have a chiller coming this week that I bought off Ebay. It's a 1/6HP unit and I only have about 90 gallons of volume, so It should work excellent!!

I did a 50% water change today to help reduce my nitrates which have been creeping up in the last two weeks. ( perhaps from the overgrowth and die-off of the calupera? )

I also noticed my salenity was pretty high. SG = 1.028 So I am bringing back down to 1.024-1.025. I'm also considering an automated top-off system to help maintain the salenity. Since my tank evaporates a gallon a day!

Saturday, July 29, 2006

The Refugium Ready to Prune


I run a 20 gallon Refug, with Calupera as the main nutrient export.

Aiptasia and Suncorals


OK, So after joining the community over at DFW Marine Aquarium Society I made some discoveries from them.

1) Aipatasia isn't a cute little anemone.. It's potentially a bad plague. So I eradicated the cute ones I had with Elim-Aipata and a syringe.

2) You have to feed suncoral daily! ( Something the LFS neglected to tell me, and I neglected to research! )

So here you can see my few survivors from my sun polyp colony's slow decline into oblivion.

So now I know you have to feed them daily, I am hoping I can bring him back from the brink of death.
I started today by covering him with a dome, and feeding him frozen reef mix, that contains some Mysis Shrimp, and other chunks of stuff. Next time I'm at the LFS I'll pick up some frozen Mysis Shrimp cubes. 5 minutes after feeding the dome he opened up! I feed the largest polyp 2 shrimps.. He was the only one who really opened. The others did open, but barely.
So I'm going to attempt to feed him daily, in hopes that I can bring them back.

Here is the resource for Sun Corals that got me educated!!

Wish me luck.

Sunday, July 23, 2006

Re-Wiring the Odyssea MH unit!


When it came time to move to the Metal Halide lights, I wasn't sure what kind to get. I wanted them to be easy to install, and attractive. I don't have a hood, and needed the lights to look nice while exposed. So I got the Odyssea because, A) cost, and B) cost.

It has 2 MH lights, 2 CF Actinic lights and a row of little blue LED moonlights. However, the first flaw is apparent when you try to hook them up to timers. The MH and Moonlights are on the same plug/ballast. So you could have them both on, or both off.. OR just turn them on and off manually. Heh. Of course I didn't know any of this when I bought the unit.

So I decided to rewire it. After all how hard could it be? The answer is, not hard at all! Now I have no prior electrical experience, and was able to pull this off.

I found some directions online here: from someone who had already done it.

The Post where I found the original directions.

My experience was different than the directions because he dididn't say anything about switches.

But basically, I found the cable leading from the plug to the switch, and spliced in the timer there.

I found that the timer doesn't work with the LED lights. I have no explanation. It just didn't.

However, it works great with the MH,and really, that's the only one you need to fix anyway. The Actinic were on another ballast altogether and could be set on a separate timer.

So here it is after it in installed into the circuit. It sure looks intimidating doesn't it? But it was easy, and as long as you remember to unplug it, it's safe.

Now aesthetically, it's not the best solution. But I figured since it's just going to sit under the cabinet, why does it need to look good? So I just set it ontop of the case of the ballast. I run the wires out of one of the vents on the side.


Here the unit is all put back together, and the timer just sitting up there.

I suppose I could get a switch box, and mount it to the ballast case.. But honestly, I probably won't.

It's working, and now I have Actinic's coming on at 12:30, the MH's coming on a 1pm, and going off at 10pm, and the Actinics going off at 10:30.. With the Moonlights on all the time.

One thing I also noticed while doing this is that the fans for the MH's had burned out. I have no idea how long they had been out, but they were. So I went up to fry's and tried to replace them. They were 40x40 12v DC fans.. but Fry's was all out. So I bought one 80X80 12v DC fan and jammed it in there. It works good, and is 100% silent. Big change over the default fans. So if you have noisy ones they are easy and cheap to replace. And new ones will be silent.

Next I'll show off the chiller. I am shopping for that now. If you have a 1/8 HP chiller for under $500 I'll buy it.. but hurry, I'm going up to the LFS tomorrow to pick up one for $545.

So look forward to that!


...Instead of wiring an extra plug for each switch, I spliced in timers in series for each circuit. This left only one plug for the entire ballast to plug in and left me with timer control of each lighting circuit independant from each other.

Here's the list of parts (from any hardware store): 16 gauge stranded wire(easier to work with in the small space), 6 wire nuts for 16 gauge wire, and 3 Intermatic wall switch timers.

WARNING - unplug the ballast box before doing any of this work.

First, prewire (for series as per the timer directions) and mount the timers in a seperate box. Be sure to label each set of wires for it's respective switch.

Second, unplug and open the ballast. Locate the white wire coming from the plug and follow it to the fuse. Coming out of the fuse will be two black wires.

Follow one, it will go to #9 on the terminal board. This will be the circuit for the MH, cut this wire (not too close to the terminal board) and splice in the timer using the wire nuts. One splice from the ballast box to the timer, another from the timer to the ballast box. It's just like repacing a wall switch.

Follow the other and you will come to a splice with two more wires.

Follow one of these to #5 on the terminal board. This is the circuit for the CF. Cut this wire and splice in the timer as above.

Follow the other one to #6 on the terminal board. This is for the moonlight. Again cut and splice in the timer as above.

You're now wired! Close up the box. I ran my wiring through the side vents of the case to prevent pinching or crimping any wires while closing up the box. This has been working very well for me and I hope it helps others.


Relaunching the Journal


So it's been awhile since I've updated anything on my tank.
Back in 2004, I started into the hobby with a used 55 overflow wet/dry system I bought off my boss for $100. You can see the old journal here: 55 Gallon Tank

So alot has happened in the last two years with my tank. The most noteworthy is that we have moved twice! In that time, I've managed to upgrade to a 75 Gallon seen here, add a 20gallon refugeum, and Odyssea MH lights, and a closed loop current system.

The 55 Gallon, was using an old design for a tank. Apparently, it was thought back in the day that a wet-dry system was ideal. So they designed them into the tank itself. However, it turns out that a wet-dry system actually introduces alot of Nitrates and Phosphates into your system. Not something you want. So after about the first 12 months the tank was getting overrun by "red hair algae" and/or "red slime algae". You can see pics on the old site. So I fought with that and became extremly discouraged from the hobby. However, I did not quit! I knew I could get a tank stable!

Then came the first move. We moved into a nice house, and decided to put the tank in the living room where there was a spare closet right next to the where the tank would be, and it'd be ideal to have all my tank equipment! Seen here:
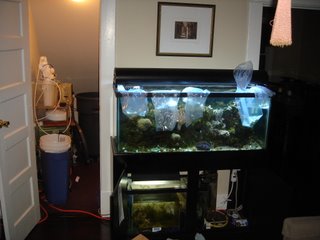
I used the move as an excuse to upgrade the tank size and get rid of the old 'problem' tank.
I upgraded to this 75 gallon, with 20 gal refugeum, and stand.

So now I had everything set. However, I was still getting horrible algea. Hair aglea everywhere! My phosphates were outrageous and I couldn't figure out why the tank was doing so poorly.

I did often water changes and was mixing with fresh R/O water I was making myself! I was keeping things pretty good as far as water conditions. Yet I was still getting massive algea growth. So here you can also see I have sent in the reinforcements. I think I got like 150 little hermit crabs and astra snails to help me clean that tank up! It helped like you wouldn't believe.
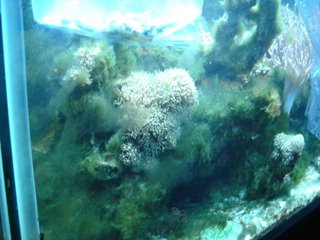
So you might wonder how it got this bad! Well, the first mistake was putting the tank in a room no one uses. It was in the front room of our house that wasn't lived in. So honestly, it got neglected because noone was ever in the room!
So I learned that lesson!

After about 6 months, the wife and I ended up buying a house, and had to move the tank yet again!

So during THIS move, I got the closed loop plumbing installed, and added a pump that'd improve circulation.

Also, the tank would now be in the main living area of the house and would get all the love it
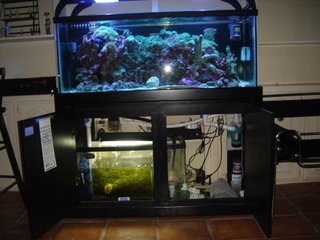
So the latest home for the tank is here, in front of some bookshelves in the living room of the new house! The shelves allow me some extra room under the tank for all the things that go there.

As you can see the crabs and snails did wonders for the algea!!

I am running the refugeum's light 24 hours a day, and have the closed loop pump running about 8 hours a day. 4 in the morning before the lights come on, and 4 in the evening before the lights go off. ( just for some randomness )

The MH and Actinic CF are on timers and are around 9 hours of day time. Moon lights run 24/7.
Now I am using the Odyssea light system. I haven't seen many positive comments on it or even anyone who even likes it, but I will tell you. They are awesome, cheap, and easy to customize. I'll go into all that on another post.

So that brings us to today. Currently, the system isn't running a skimmer, although I have one installed, and all it needs is to be turned on. However, the refugeum is doing such a great job, I don't need to skim!

My tempeture is running too high these days. ( 80 degrees F! ) I blame that as the leading cause of death for my Croatia Clam I have had since the early days of the tank. ( 2 years! )
It just died about a week ago, and you can still see it's white shell. I keep it there as a tombstone of sorts. Poor guy.. So now I'm getting a chiller. More on that when it comes.

So check back to this blog, I hope to update it more often with progress on the new tank.

tank started to get this really bad "red hair slime algea". Oh it was horrible, and you can see photos on the Old site. deserved!